
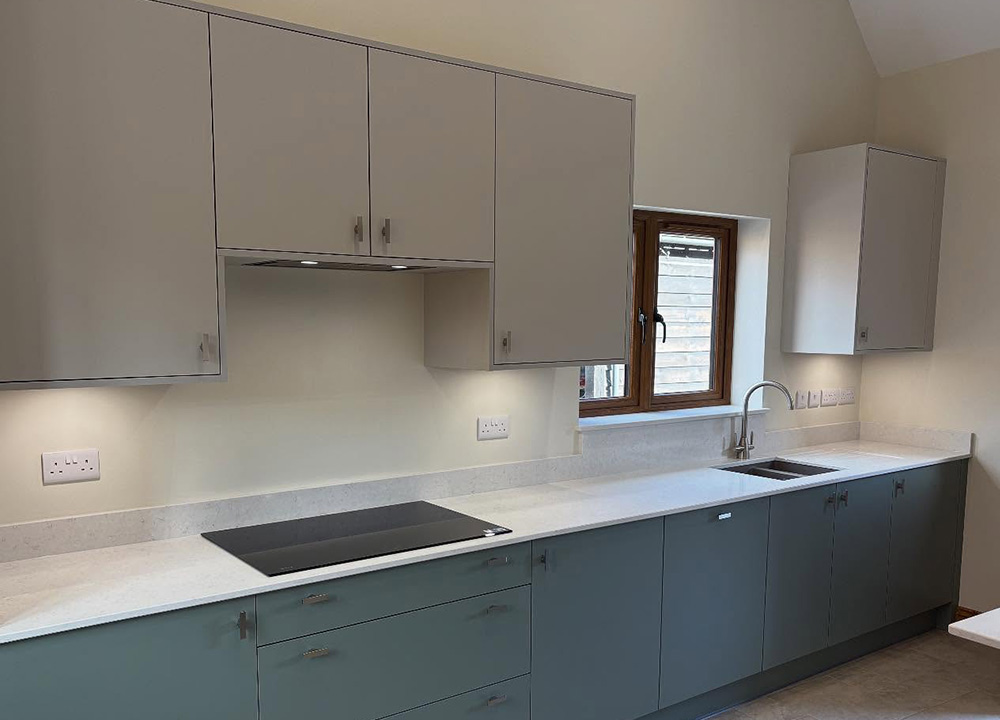
A successful kitchen installation begins well before the first tradesperson arrives at your door. Proper preparation not only helps the project run more smoothly but can also reduce installation time and minimise disruption to your household. Taking the right steps beforehand ensures your installers can focus on delivering quality results rather than working around obstacles.
Here's your guide to preparing your home for a kitchen installation.
Clear the Kitchen and Access Routes
The most important step is emptying your existing kitchen. Remove everything from cupboards, drawers, and worktops, and don't forget items stored on top of wall units, inside appliances, or in less obvious places like under-sink storage. Consider this an opportunity for a thorough declutter — you may find items you no longer need.
You'll also want to clear any rooms and walkways that lead to the kitchen. Your installers will need to move materials, appliances, and old units through the house, so keeping these routes free of furniture, rugs, and ornaments makes a real difference. If large items like worktops need to come through the front door and along a hallway, make sure there's plenty of space to manoeuvre.
Pack items systematically, labelling boxes clearly so you can find essentials during the installation period and unpack efficiently once work is complete.
We Take Care of Property Protection
One thing you don't need to worry about is protecting your home — that's our job. At Jones Kitchens & Bathrooms Ltd, we bring a wide range of property protection materials with us to every project. From heavy-duty floor coverings and dust sheets to surface protectors for carpets, tiles, and wooden floors, we make sure your home is properly looked after from start to finish.
You won't need to provide your own sheets or coverings. We take pride in treating your home with respect, and that starts with thorough protection of your floors, surfaces, and belongings before any work begins.
Set Up a Temporary Kitchen
Kitchen installations can take several days, so establishing a temporary cooking and food preparation area is a good idea. Choose a location away from the main work area — perhaps a dining room, utility room, or even a garage if weather permits.
A kettle, microwave, and mini-fridge will cover most of your needs. Don't forget plates, cups, cutlery, and basic cooking utensils, along with a washing-up bowl. Plan your meals around this limited setup, perhaps relying more on simple foods that require minimal preparation during the installation period.
Sort Out Utilities and Services
Ensure gas, electricity, and water supplies are easily accessible. If you know where your stopcock, gas shut-off valve, or consumer unit are located, point these out to your installers on the first day. Some installations may require temporary disruption to services, so it's worth being prepared for this.
If any utilities need to be disconnected or relocated before work begins, we'll discuss this with you during the planning stage so there are no surprises.
Plan for Disruption
Kitchen installations are naturally disruptive, so it's worth planning your household routine accordingly. If you have young children, elderly relatives, or pets who might find the noise and activity unsettling, consider making alternative arrangements during particularly busy phases of the work.
It's also worth letting your neighbours know about the planned work, especially if early starts are expected. Good neighbourly relations make the whole process more pleasant for everyone.
Prepare Your Documentation
Gather any relevant documentation including installation plans, appliance manuals, and warranty information. Keep these easily accessible, as your installers may need to refer to them during the project. If you have specific requirements or concerns, jot them down so you don't forget to mention them when work begins.
Setting the Stage for Success
Thorough preparation is a partnership between you and your installers. The time invested in getting your home ready is almost always repaid through a smoother installation and a better overall experience. If you're ever unsure about what's needed, just ask — we're always happy to talk you through what to expect.
To discuss your kitchen project or find out more about how Jones Kitchens & Bathrooms Ltd can help, give us a call on 01584 534554 or drop us an email at barney@joneskb.co.uk.


.svg)
